Accessing your FTP host, username and password
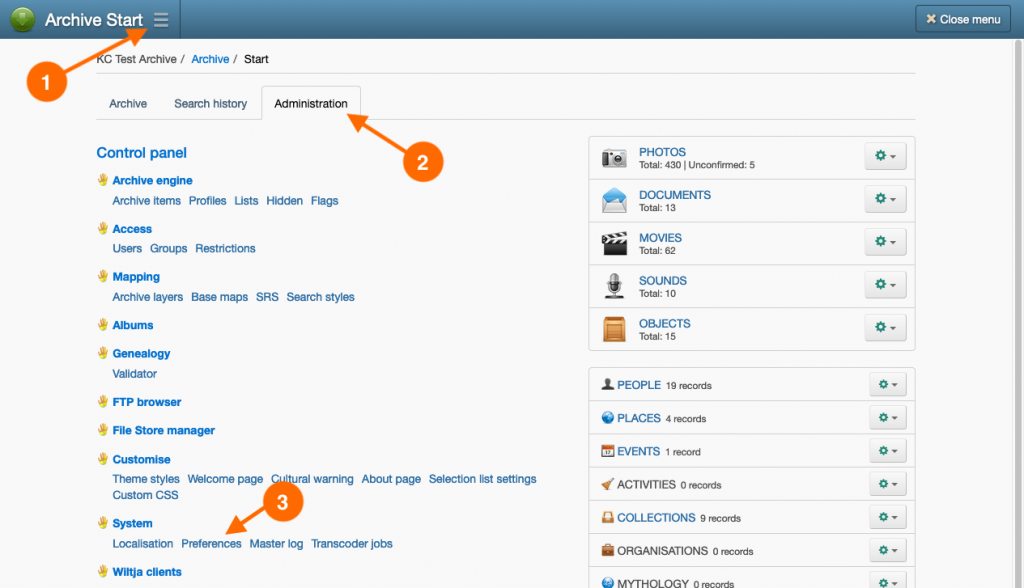
Your archive’s FTP account details are displayed in the FTP Settings tab on the Preferences page.
FileZilla client setup
- Install FileZilla Client on your computer. It can be downloaded from https://filezilla-project.org/ Make sure you download the ‘client’ and not the ‘server’ version.
- Launch FileZilla and select Site Manager from the File menu.
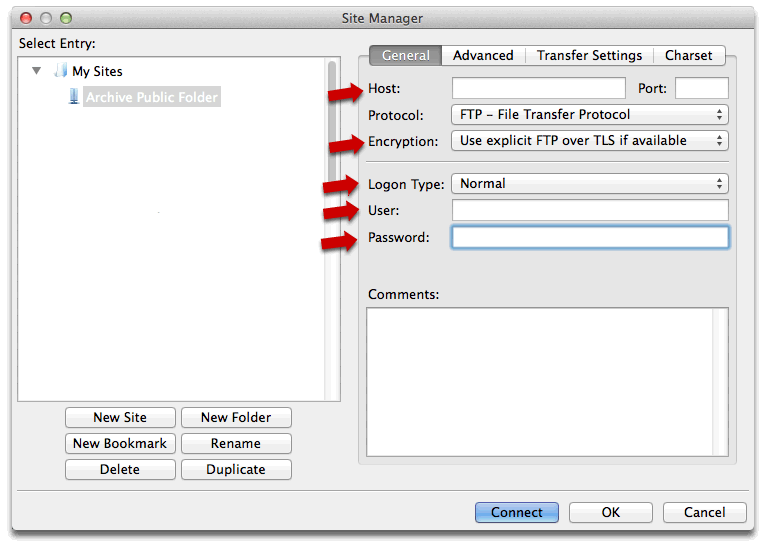
- In the Site Manager window, click New Site and name the new site ‘Archive Public Folder’.
- With the ‘Archive Public Folder’ selected in the list and the General tab enabled, change the following settings:
- Host: {enter the ‘Host’ name displayed on the archive’s Preference page.}
- Protocol: FTP – File Transfer Protocol
- Encryption: Use explicit FTP over TLS if available
- Logon Type: Normal
- Username: {enter the ‘Username’ displayed on the archive’s Preference page.}
- Password: {enter the ‘Password’ displayed on the archive’s Preference page.}
- Click Connect. Your setting will be saved for the next time you use FileZilla.
The first time you connect to the Keeping Culture FTP server a window titled Unknown certificate will open. Compare the certificate fingerprints display in the window with the fingerprints displayed in the FTP Settings tab on the Preferences page.
If the fingerprints are identical, then enable the Always trust this certificate in future sessions checkbox and click OK. Otherwise, contact Keeping Culture support if the fingerprints do not match.
Transferring files with FileZilla

Once connected to your archive’s FTP folder you can:
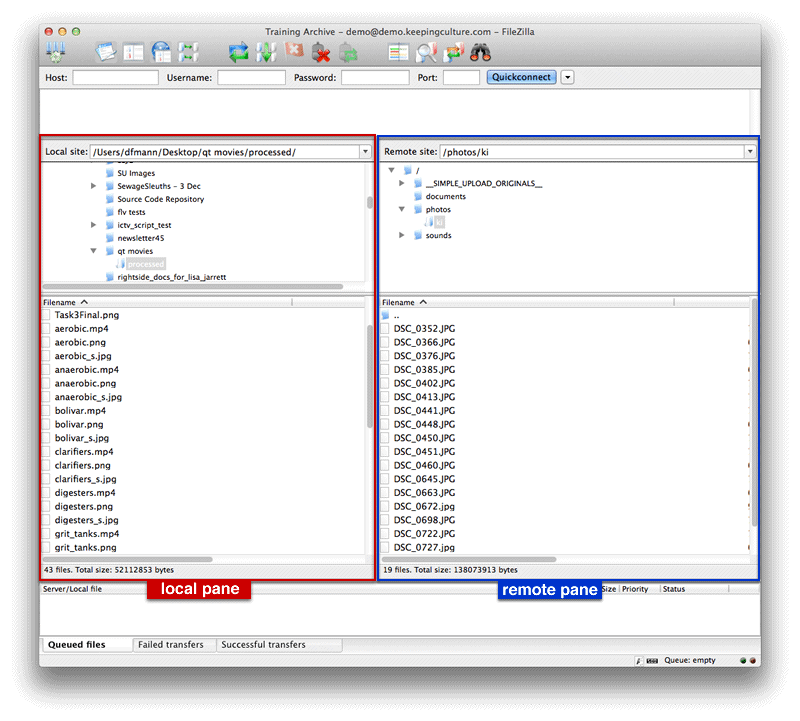
- upload files to the archive’s FTP folder by locating your files in the local pane and dragging them to the remote pane.
- download files from the archive FTP folder by locating your files in the remote pane and dragging them to the local pane.
- create directories by right-clicking (or clicking with the ‘control’ key held down on a Mac) in the local or remote pane and selecting ‘Create directory’.
- delete files/directories by right-clicking (or clicking with the ‘control’ key held down on a Mac) on the file or directory and selecting ‘Delete’.
Tip: Always check the Failed Transfer tab at the bottom of the window after transferring files. This will list any files that were not successfully uploaded or downloaded during the transfer. You would usually locate these failed files and attempt the transfer again.


